API Workflow
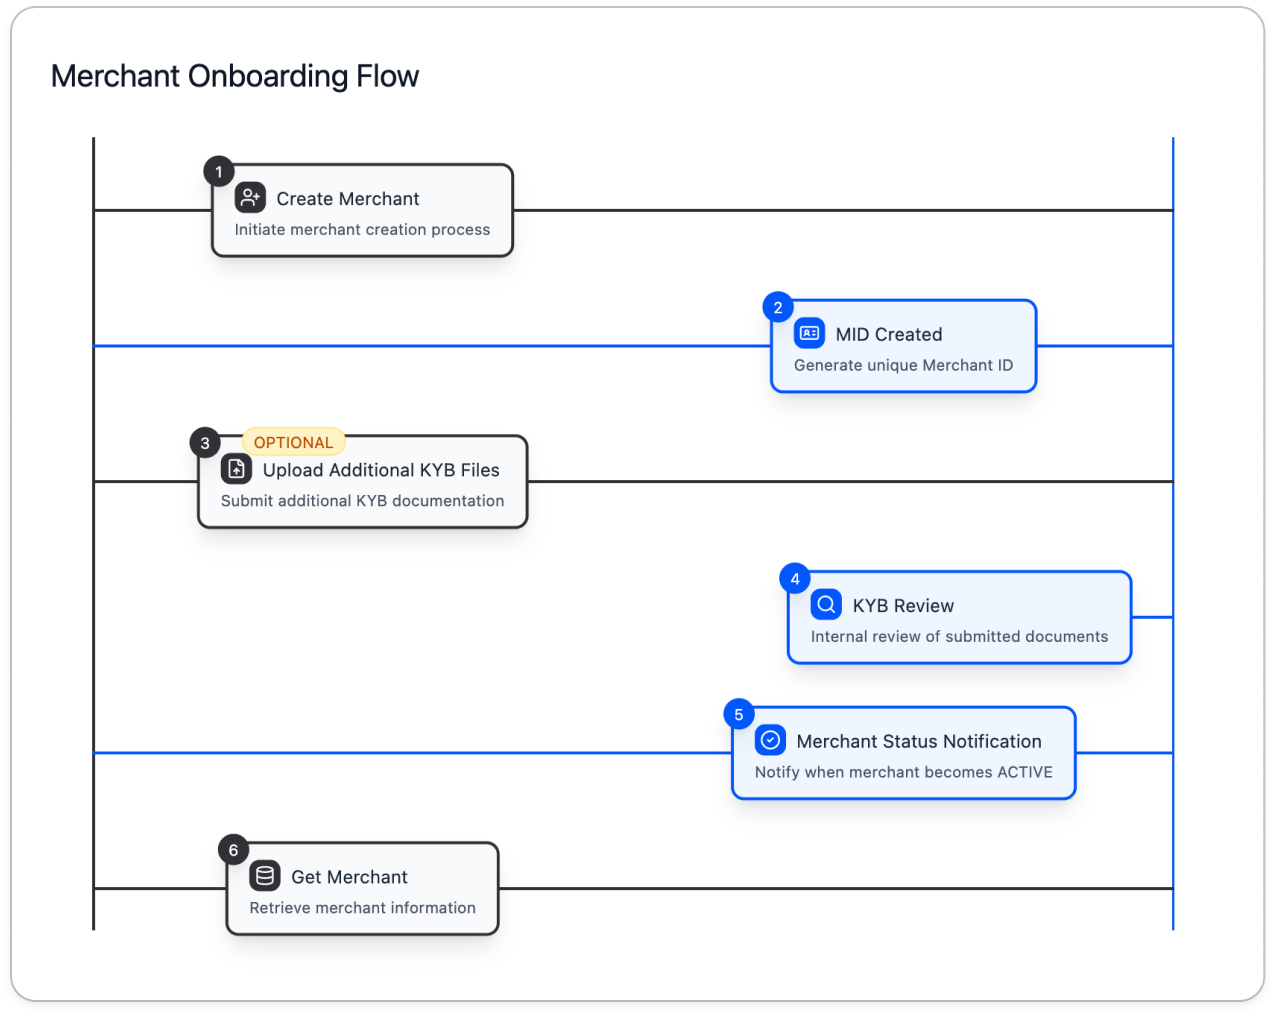
Merchant Onboarding
This flow outlines the key steps for registering and onboarding a merchant via SentBiz API.
-
Create Merchant
Register a new merchant. A Merchant ID (MID) is issued immediately, even if KYB is not yet complete. -
Upload KYB Documents (Optional)
If KYB files were not submitted during registration, they can be uploaded later via API. -
Merchant Screening & Setup
SentBiz conducts internal checks and prepares the merchant for activation. -
Status Change Notification (Webhook)
Once KYB is approved, a status update is sent to the webhook URL provided during merchant creation. -
Check Merchant Status (Optional)
Use the Get Merchant API to confirm the current status using the MID.
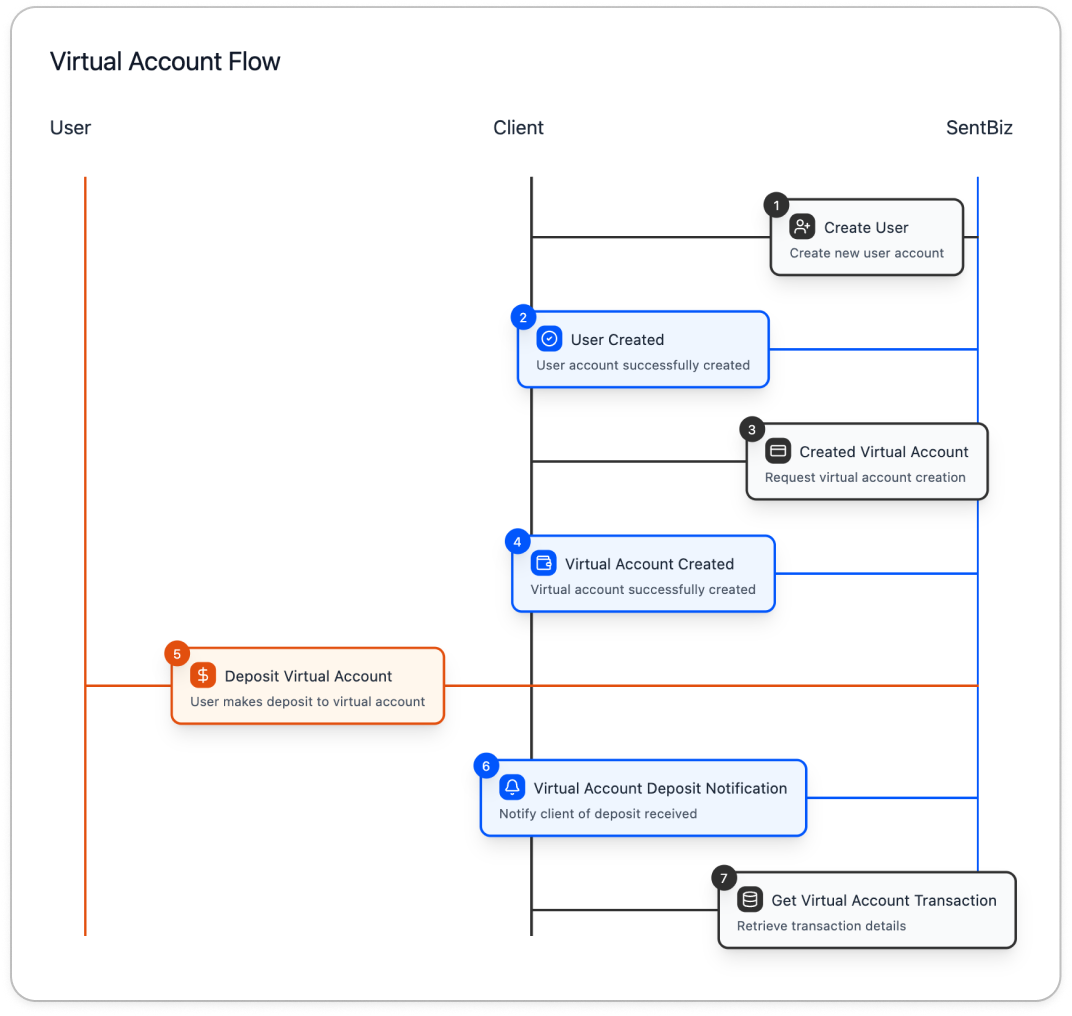
Pay-In
This flow describes the process of issuing and using a virtual account in SentBiz.
-
Create User (Optional)
Create a user to be associated with the virtual account.
If the user already exists, you can retrieve it using the User Search or List API. -
User Creation
SentBiz creates the user based on the provided information. -
Request Virtual Account Issuance
Submit a request with user and virtual account details to issue a virtual account. -
Virtual Account Issued
SentBiz issues the virtual account and returns its details.
You can retrieve the virtual account info via the Get Virtual Account API. -
Deposit to Virtual Account
The client’s customer deposits funds into the issued virtual account.
SentBiz receives deposit confirmation from the bank.
You may simulate this step using the Test Deposit API in the sandbox environment. -
Deposit Notification (Webhook)
Once the deposit is confirmed, SentBiz sends a notification to the webhook URL provided by the client. -
Verify Deposit Details
Use the Virtual Account Transaction API to check the deposit history and details.
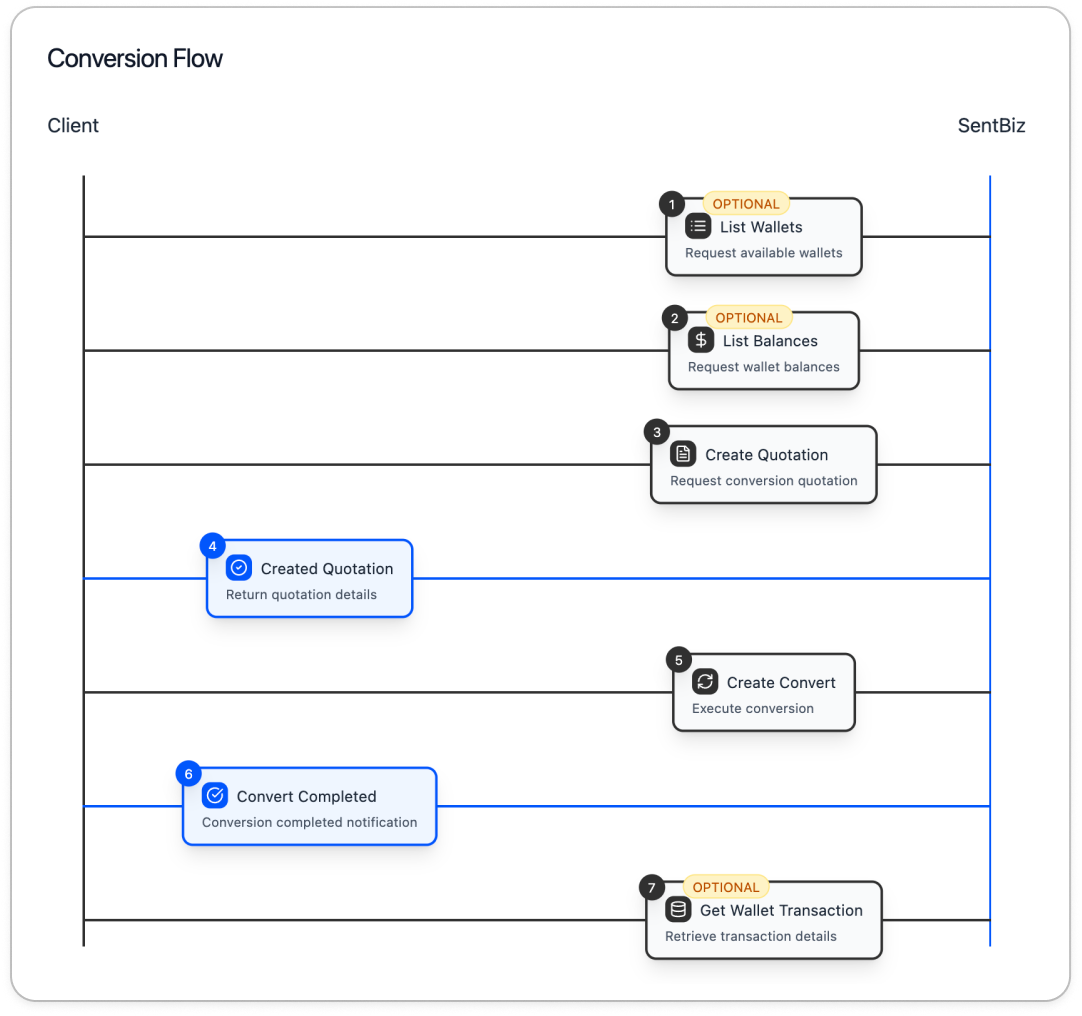
Conversion
This flow describes how to perform a currency conversion using wallets in SentBiz.
-
List Wallets (Optional)
Retrieve a list of wallets owned by the client. -
Check Wallet Balances (Optional)
Confirm the available balance in the wallet.
Conversion can proceed only if the balance is sufficient. -
Create Quotation
Request a conversion quote based on the amount to be transferred.
You may reuse an existing valid quote using the Quote Search or List API.
Expired quotes cannot be used. -
Create Conversion
Initiate the conversion using a valid quotation. -
Check Conversion Details (Optional)
Use the Wallet Transaction List or Search API to view the conversion details.
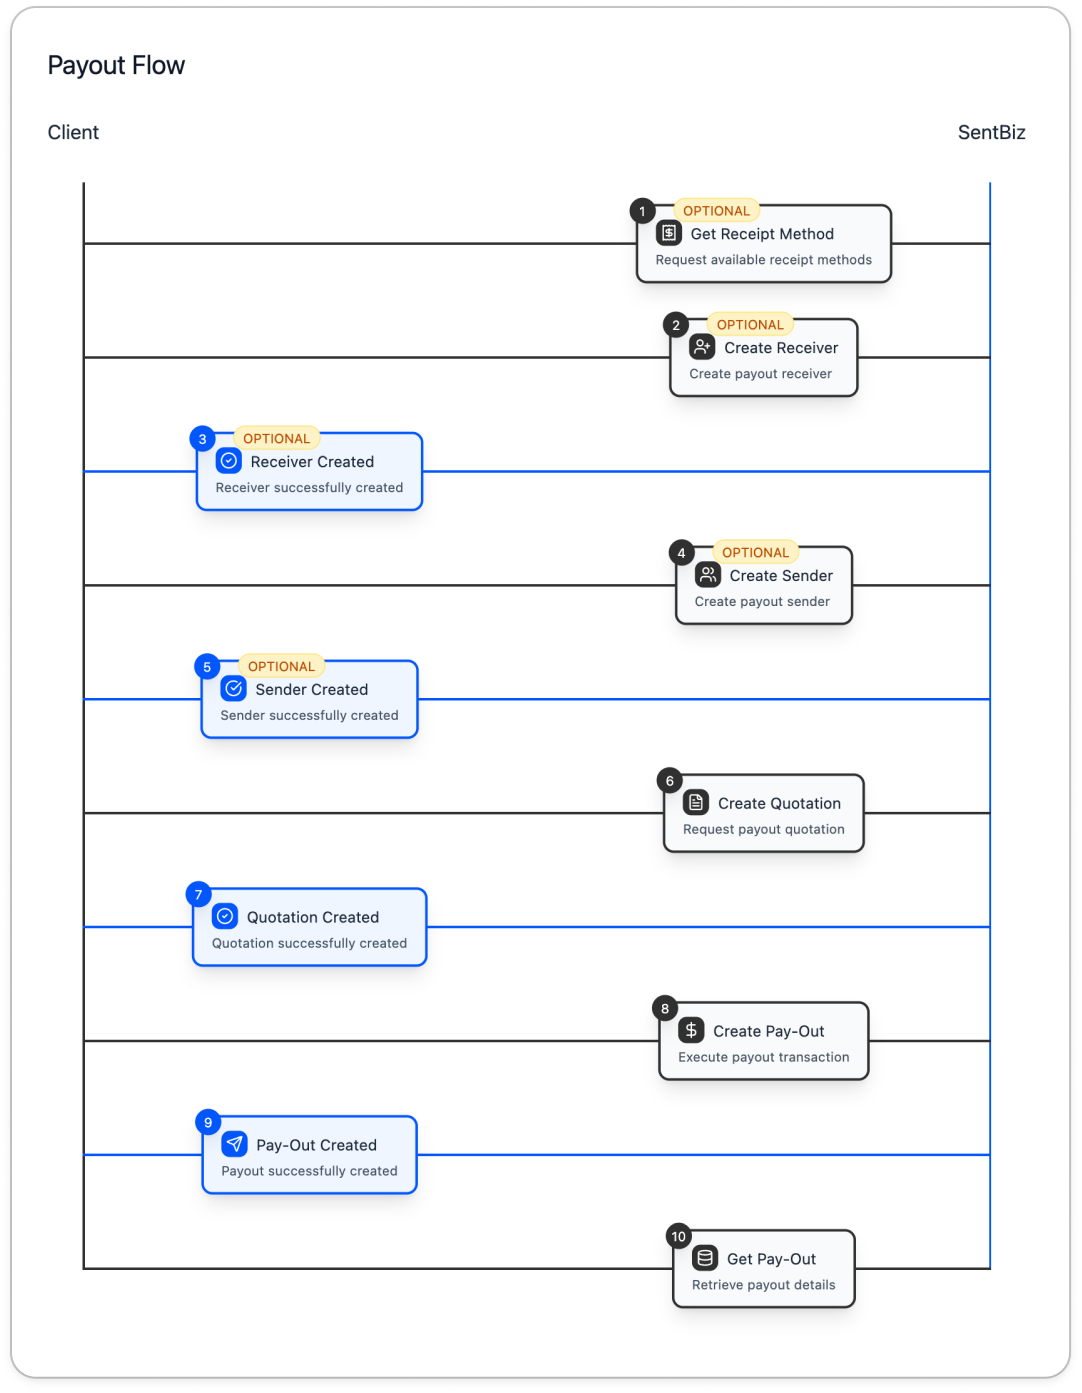
Pay-Out
This flow describes how to initiate and manage a pay-out using SentBiz APIs.
-
Get Receipt Methods (Optional)
Retrieve available payout methods and supported institutions.
These methods are used when creating a pay-out. -
Create Receiver (Optional)
Register the pay-out recipient.
Receiver information is required when creating a quotation.
Existing receivers can be found using the Receiver Search or List API. -
Create Sender (Optional)
Register the sender who is sending the funds.
Sender information is also used during quotation creation.
Existing senders can be found using the Sender Search or List API. -
Create Quotation
Create a pay-out quotation using sender, receiver, and amount information.
You may reuse a valid quotation via the Quote Search or List API.
Expired quotes cannot be used. -
Create Pay-Out
Initiate the pay-out using a valid quotation. -
Check Pay-Out Status
Use the Get Pay-Out API to verify the status and details of the pay-out.